Bidule configuration
In this article, we will show how to configure recording and signal separation in Bidule.
Plogue’s Bidule is a modular audio software which supports multichannel (up to 32 channels) recording and processing. It allows the user to freely route an audio signal between modules such as recorders, players, VST/AU plugins and many more. Bidule’s workflow is similar to working with audio hardware – connections between modules are done using “cables”. The difference is that you can connect multiple inputs with a single output socket.
Recording
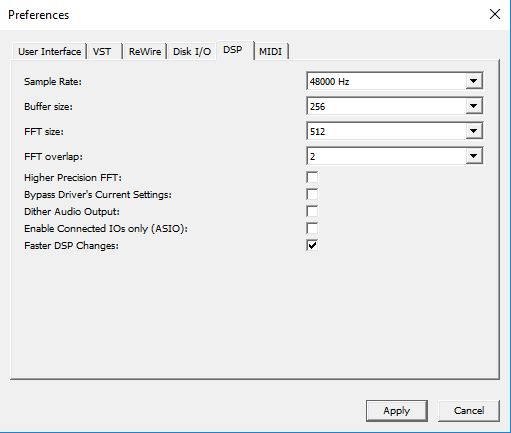
The first step is setting proper parameters for your session. ZYLIA software and ZYLIA ZM-1 works with 48 kHz sample rate. To set it in Bidule click on Edit menu and choose Preferences. Open DSP tab and set sample rate to 48 kHz.
Next step is choosing the Audio Device.
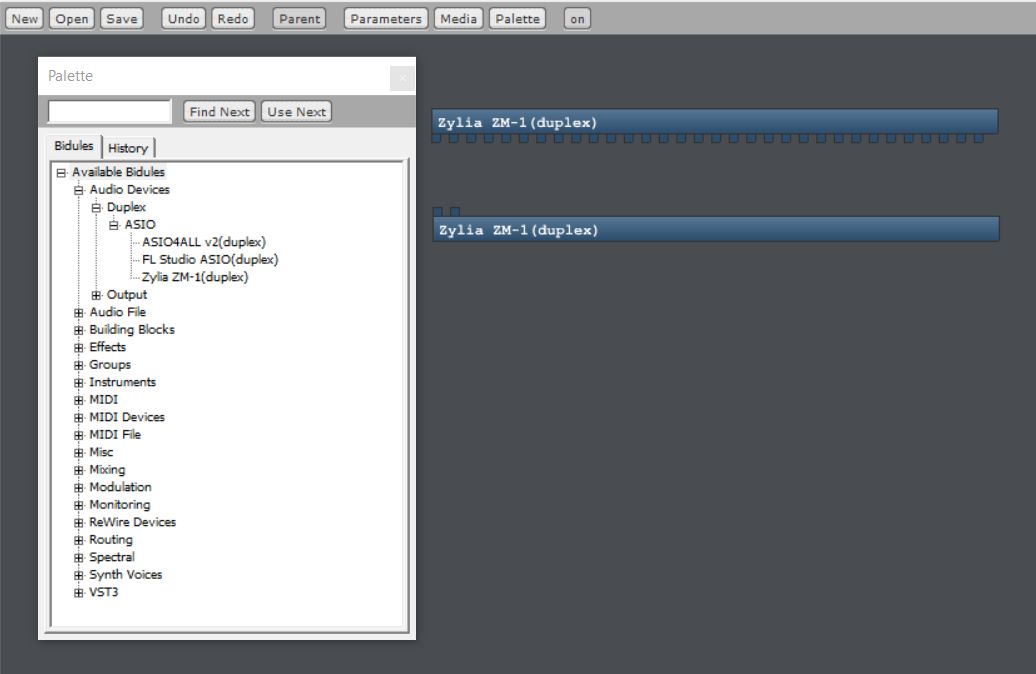
Click on the Palette button, expand Audio Devices → Duplex → ASIO and double-click on ZYLIA ZM-1. The device will show up as a block with 32 input and 2 output channels.
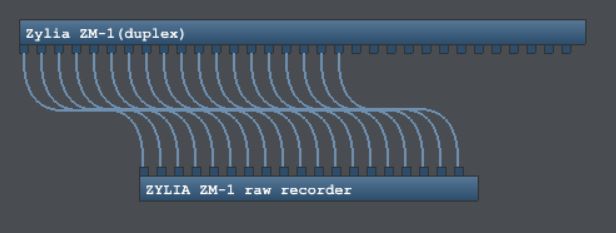
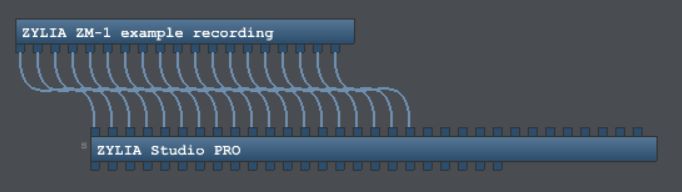
Now we should set up the recorder for ZYLIA ZM-1 raw 19-channel signal. To do it, right click on the patcher, and choose Audio file → Recorder → 19-channels and connect it with ZYLIA ZM-1 input sockets (simply click on the socket and connect it to the desired one).
To further process the signal from ZYLIA ZM-1 add ZYLIA Studio PRO (you will find it in the VST submenu) and connect the plugin with ZM-1.
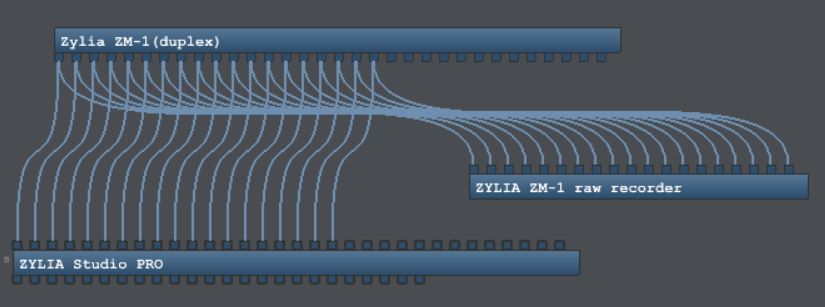
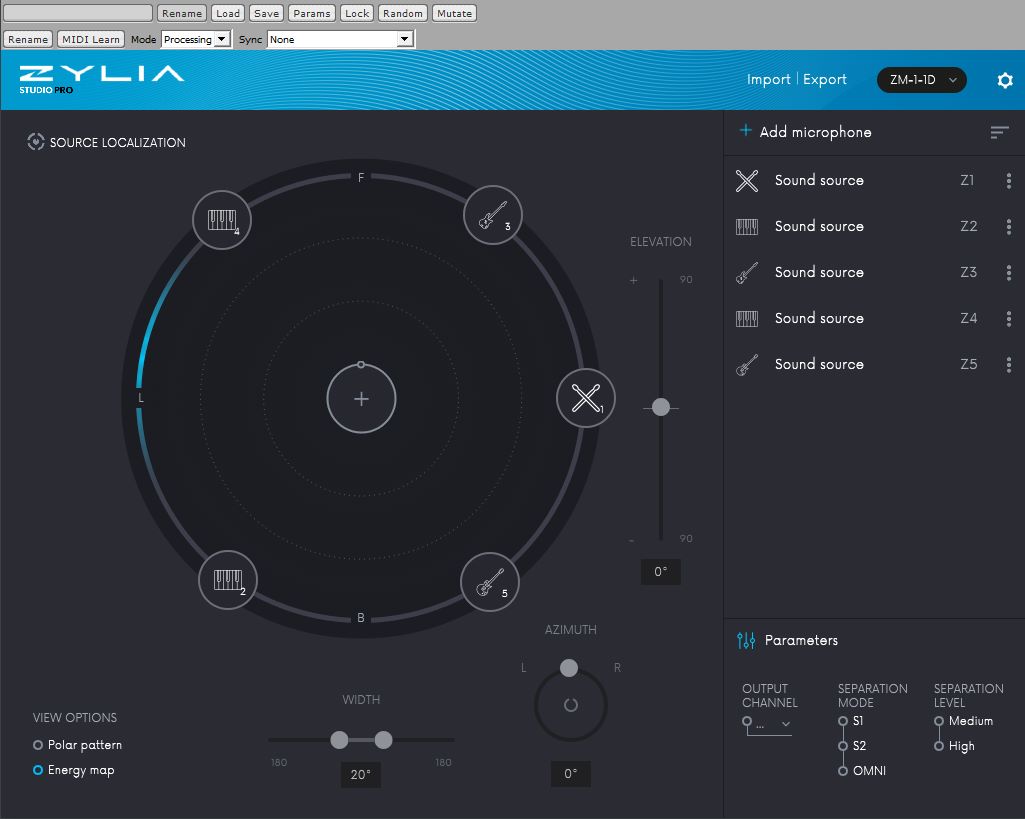
Now open ZYLIA Studio PRO and set up Virtual microphones.
After doing this, set up another recorder with as many inputs as many virtual microphones in ZYLIA Studio PRO.
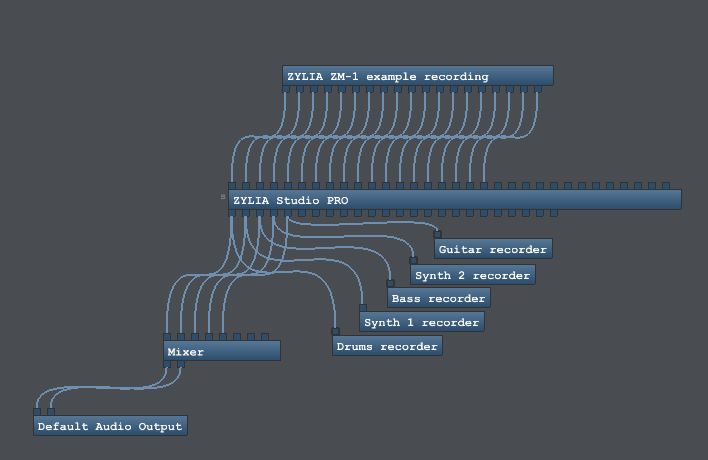
In the end, your layout should look like the one presented in the below picture.
Separation
Separation layout in Bidule is similar to the recording – this time we will choose audio player instead of ZM-1. In the example below, we used built-in soundcard but you can change it to any other audio interface.
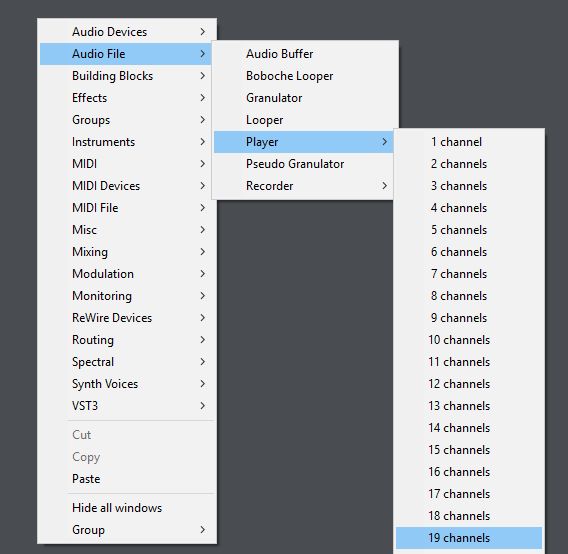
Firstly add a player (Audio File → Player → 19 channels)
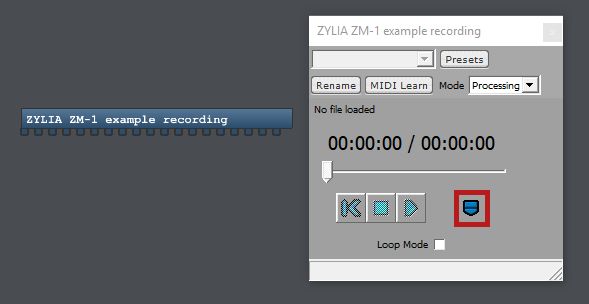
Double click on the player, then click on the loading button and choose the raw ZM-1 recording
Then connect the player with ZYLIA Studio PRO and set Virtual microphones up.
Next step is to route the output of Virtual microphones – in the example, we recorded it and routed it to the mixer in order to connect it with the Audio Output device.
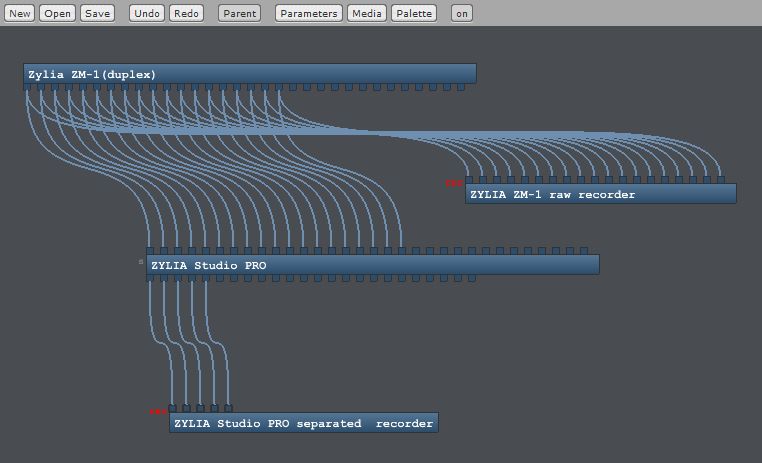
The whole configuration is presented in the picture below.