How to prepare a 360 video with Spatial Audio
In general VR related workflows can be complex and everyone seems to be looking for standard solutions. Here, we will show you, step by step, how to prepare a 360 video with spatial audio in, possibly, the shortest way! Required gear:
- ZYLIA ZM-1 microphone array;
- A 360 camera (e.g. Insta 360 One X);
- A computer.
After following steps A, B and C, you’ll have a video file with 1st order Ambisonics spatial audio that can be played on your computer with compatible video players (e.g. VLC) or uploaded to YouTube.

OK, let’s have a close look at each step.
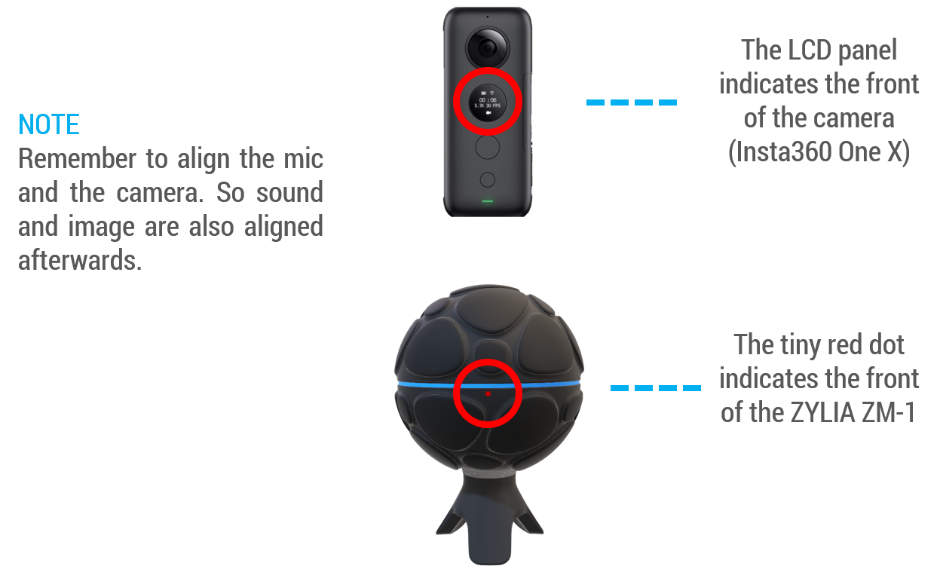
 | Put your ZM-1 mic and a 360 camera (we’ve been using an Insta360 One X here). Ideally, you’d keep the camera on the top and mic on the bottom and they’d be aligned to a single vertical axis. |
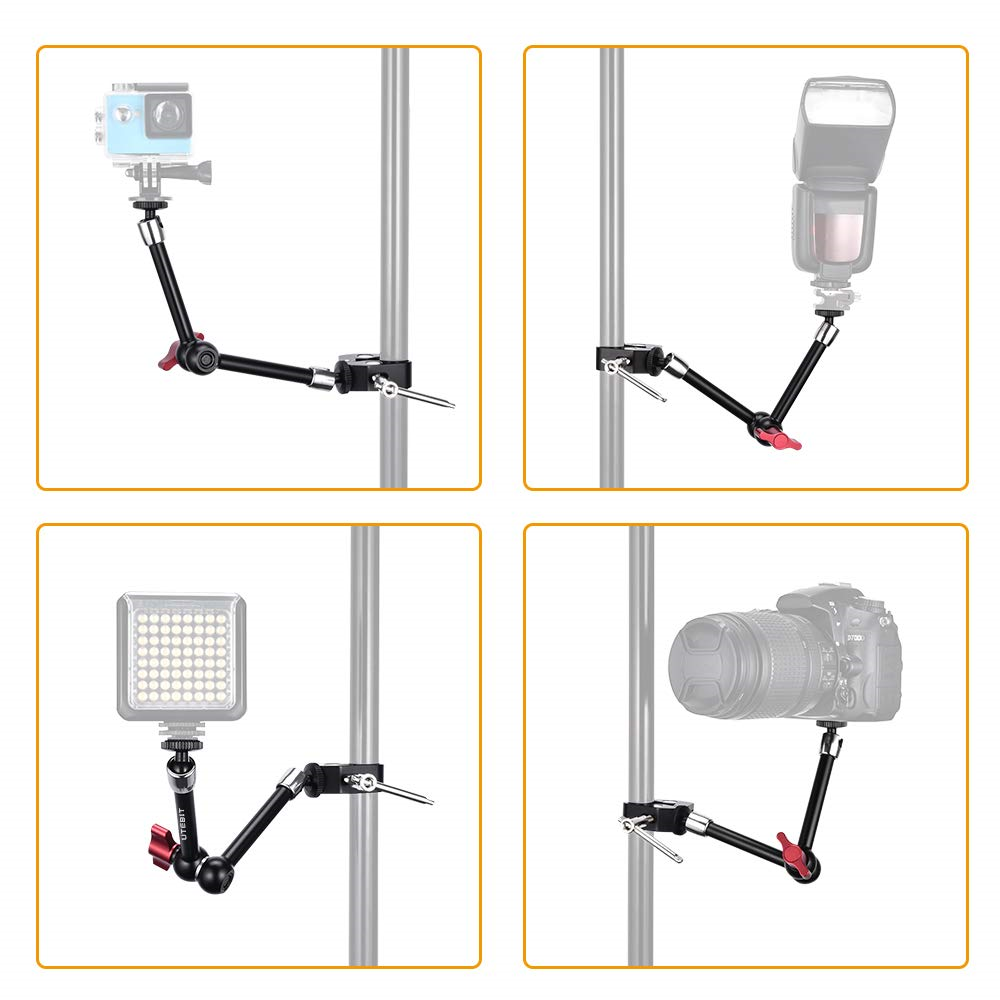
There are many ways to achieve this. It depends on available gear. A simple, flexible and sturdy way to do it is to use a standard microphone stand and 2 articulated “magic arms” like this one:
Amazon.com
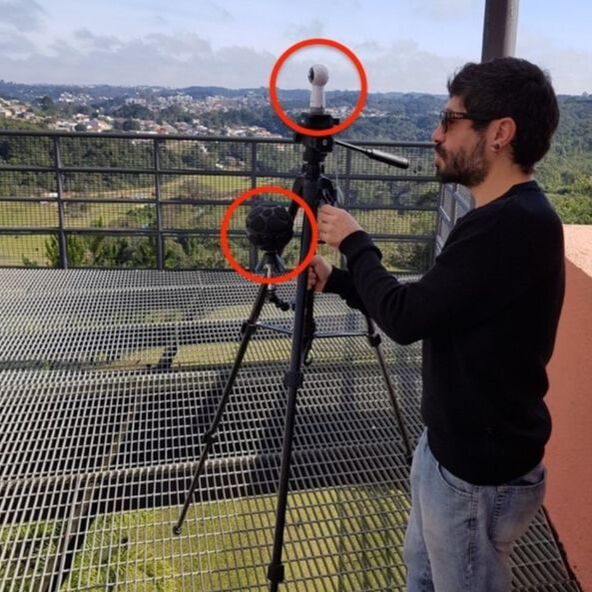
| Having said that, a small horizontal offset is not the end of the world see this arrangement here: |
With the gear in place, start recording both audio and video and clap in between the mic and the camera. The clap sound spike can be used to sync the footage later.
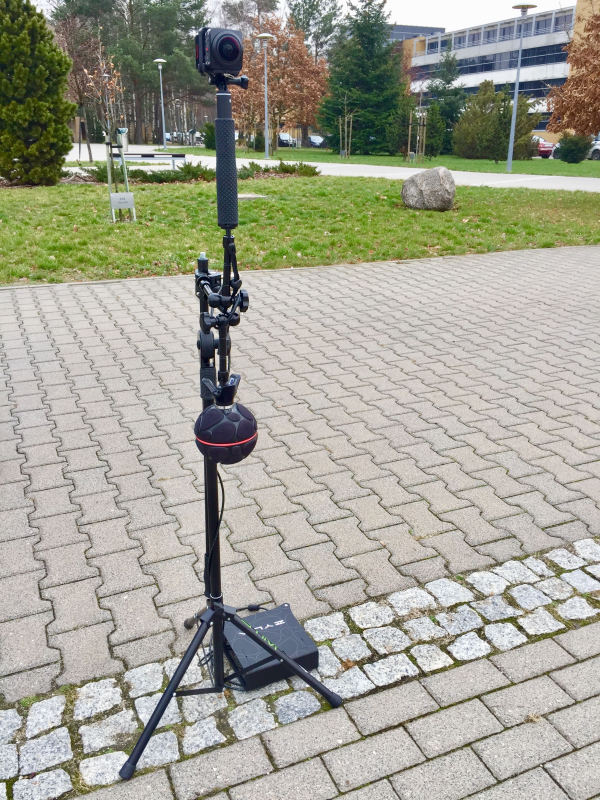
Here’s a pic of one of our recording setups:ZYLIA ZM-1, ZYLIA ZR-1, Kodak Pixpro SP360 and mic stand with ‘magic arms’
 After recording, it’s time to put sound and image together, do a simple edit and render the file. Make sure you have all the software tools (download links below*). After recording, it’s time to put sound and image together, do a simple edit and render the file. Make sure you have all the software tools (download links below*). |
- Bring your files (the 19-channel audio from the ZM-1 and the video one from your camera) onto the DAW;
- Lower the video volume;
- Align the clap position;
- Trim the ends;
- Adjust the volume of the audio file;
- Add ZYLIA Ambisonics Converter Plugin to the audio track and adjust the settings;
- Change the master output to 4 channels;
- Render!
Here’s a video showing all the sub-steps in Reaper:
Note
If you need to check how the recording sounds, add a binaural decoder plugin (e.g. IEM Binaural decoder) to the audio track, after ZYLIA Ambisonics Converter.
 This is the last step. Just load the file rendered / exported from Reaper onto Google’s Spatial Media metadata injector, check the appropriate box for your kind of 360 video and check the bottom option: “My video has spatial audio”.
Click on “Inject metadata” and save the new injected file.
That’s it!
Now you can enjoy the spatial audio
- By playing it on your computer, using VLC player, for example (very few players will handle 360 video + Ambisonics correctly); or…
- By uploading it to YouTube.
*Software tools used
ZYLIA Ambisonics Converter plugin
https://www.zylia.co/zylia-ambisonics-converter-plugin-download.html
Google Spatial Media Metadata Injector
https://github.com/google/spatial-media/releases/tag/v2.1
Reaper DAW
https://www.reaper.fm/download.php
IEM Binaural Decoder
https://plugins.iem.at/download/
Mounting:
https://www.amazon.com/Stage-MY550-Microphone-Extension-Attachment/dp/B0002ZO3LK/ref=sxbs_sxwds-stvp?keywords=microphone+clamp+arm&pd_rd_i=B0002ZO3LK&pd_rd_r=6860690f-2adc-4b00-a80e-de436939ed2b&pd_rd_w=GlE2J&pd_rd_wg=qrTTx&pf_rd_p=a6d018ad-f20b-46c9-8920-433972c7d9b7&pf_rd_r=GGS60M0DGQ5DQF44594V&qid=1575529629
https://www.amazon.com/Aluminum-Microphone-Swivel-Camera-Monitor/dp/B07Q2V6CBC/ref=sr_1_186?keywords=microphone+boom+clamp&qid=1575529342&sr=8-186
https://www.amazon.com/Neewer-Adjustable-Articulating-Mirrorless-Camcorders/dp/B07SV6NVDS/ref=sr_1_205?keywords=microphone+clamp+arm&qid=1575531393&sr=8-205