Reaper session configuration
This article will show you how to configure Reaper session to work with ZYLIA Studio PRO.
Mixing
Audio device setup
The first step to get ZYLIA Studio PRO plugin to work is an audio device configuration.
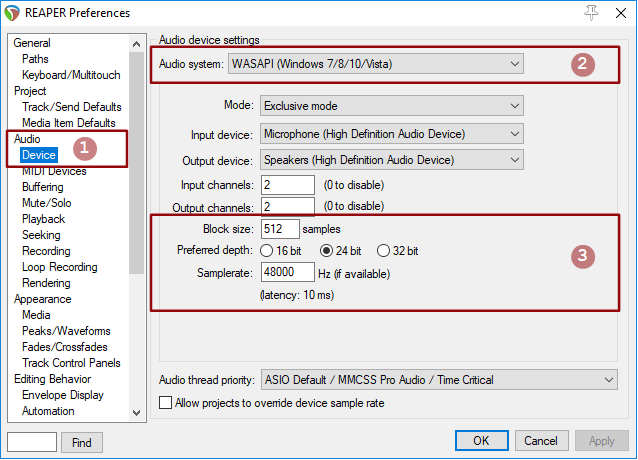
- Open REAPER Preferences and choose Audio → Device (1).
- Set up your audio system in Audio System section (2).
Routing
The second step is proper tracks routing.
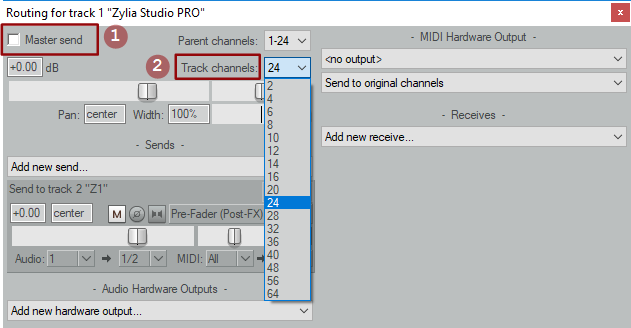
- Add at least two tracks. First one is “Zylia Studio PRO” with imported ZM-1 19-channel recording.
- Click on Routing button, deselect Master send option (1) and set Track channels to 24 (2)
- Then click FX button and add ZYLIA Studio PRO plugin.
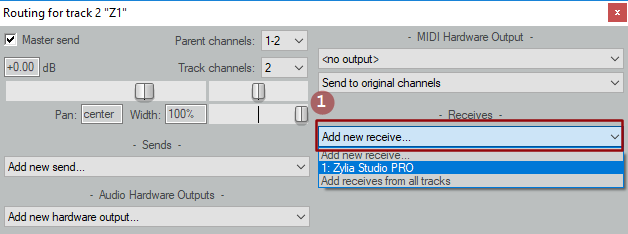
Now it’s time to take care about the second one, “Z1” track. This is “output” track for ZYLIA virtual microphone.
- Click Routing button and Add new receive, choose the track with ZYLIA Studio PRO plugin
- Click on the menu with types of received signal and set it to Pre-Fader (Post-FX) (2)
Then click on audio input menu (3) and pick Mono source and channel number corresponding to virtual microphone output (in this example it’s Z1)
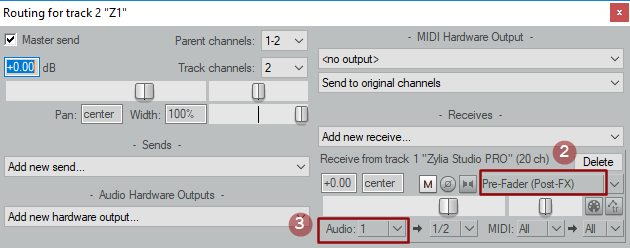
Similar settings are applicable for more virtual microphones – just add more “output” tracks and set them up as above (remember to choose proper audio input channel number).
Recording
Audio device setup
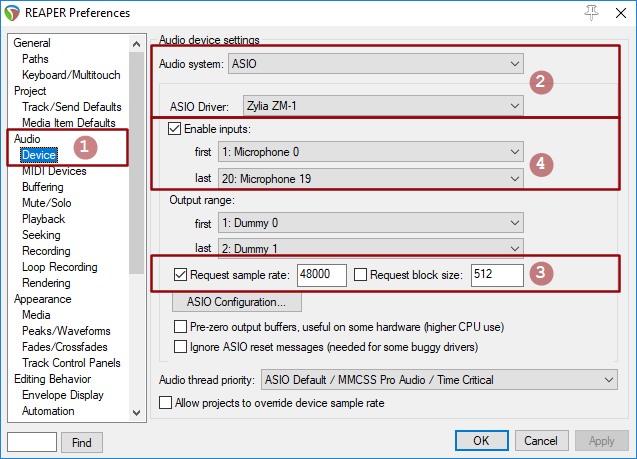
Plug in ZM-1, open REAPER Preferences Audio → Devices (1).
a) If you are using Windows – choose ASIO as your Audio system and as ASIO driver pick ZYLIA ZM-1 (2). It’s important to enable Request sample rate option and set 48000 Hz.
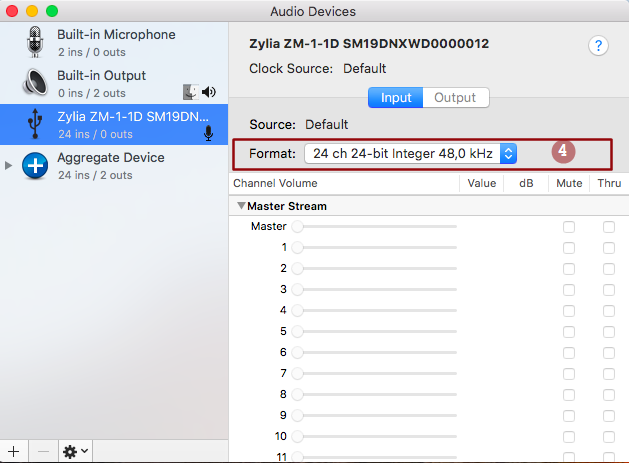
b) MacOS users can pick both ZYLIA ZM-1 or Aggregate Device (more in Appendix) as their Audio System. Main advantage of second solution is possibility to listen to output of ZYLIA virtual microphones and raw 19-channel track (input monitoring). In Audio MIDI Setup you have to choose 20-channels or more in Format section (4).
Routing
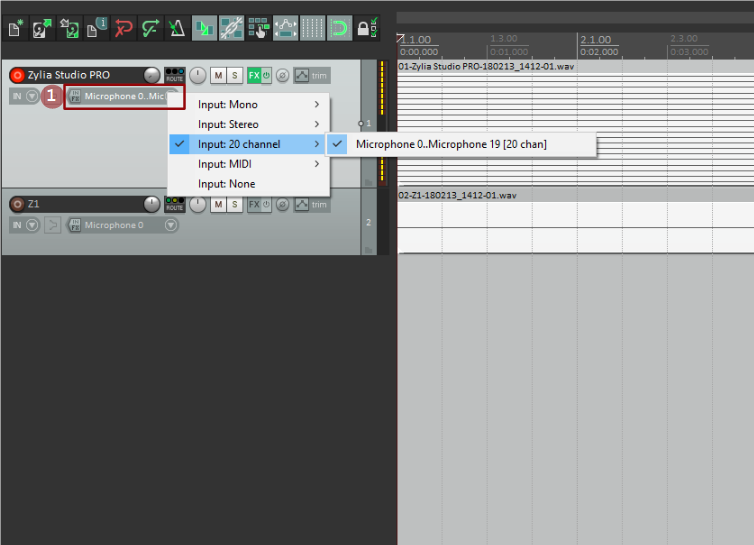
Routing for recording is similar to mixing setup. You should add a track for 19-channel recording with plugged ZYLIA Studio PRO and “output” track for each virtual microphone. Remember to set up an appropriate number of “Zylia Studio PRO” track’s channels and assign each “output” track’s audio input to the corresponding virtual microphone output
1. To start recording choose 20 channel (or more) input for your “Zylia Studio PRO” track and arm it (1).
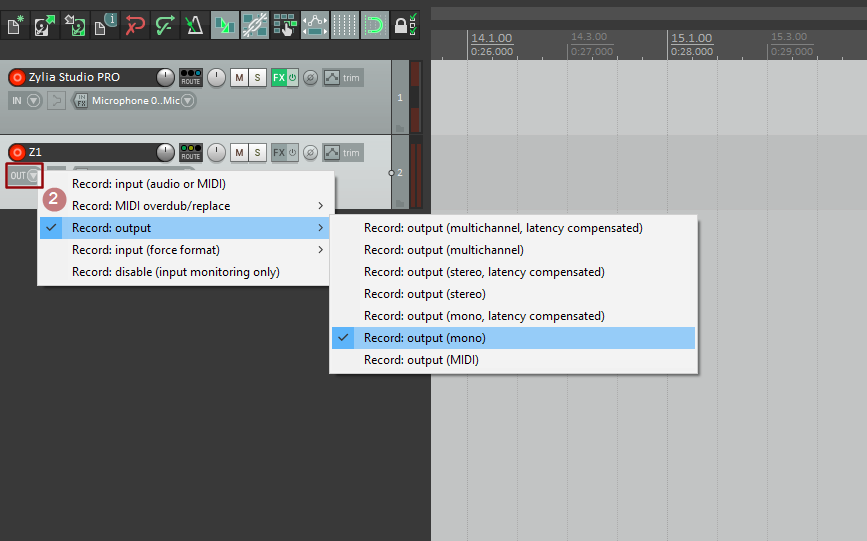
2. You can also record a signal from virtual microphones – choose Record: output (mono) option and set input to None.
Appendix (Aggregate Device)
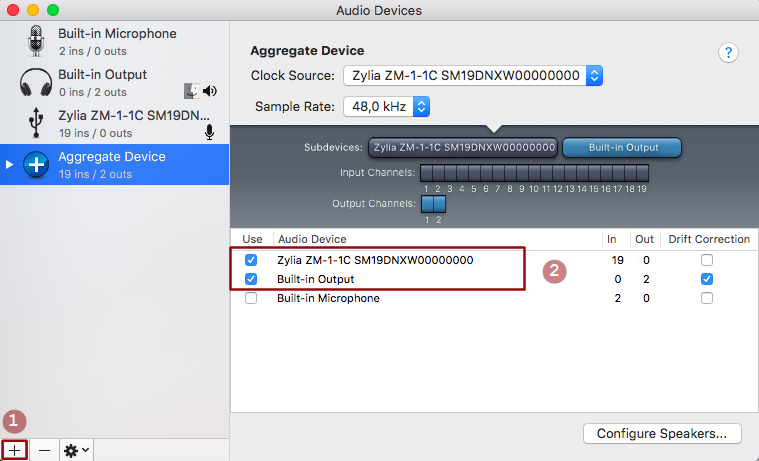
To create the Aggregate Device:
- Plug in ZM-1.
- Open Audio MIDI Setup.
- Click on plus icon and add aggregate device (1).
4. Enable ZM-1 and your output (in this case it’s Built-in Output) in “Use” section(2).
5. Open REAPER Preferences → Audio → Devices and choose Aggregate Device as your audio device (1).
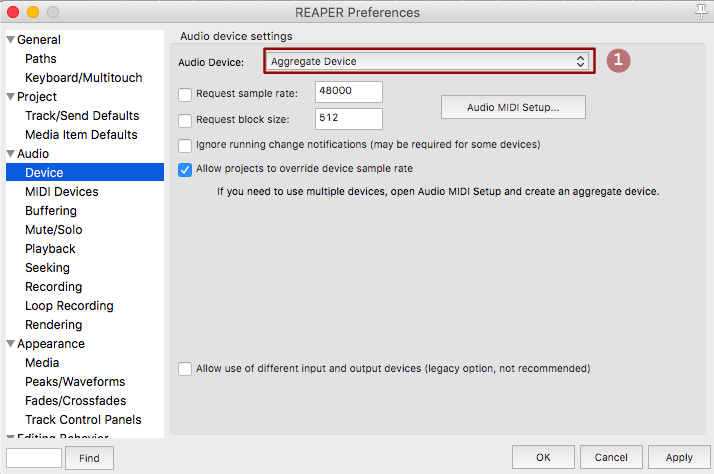
6. Enable input monitoring of recorded tracks (2).
